Finding an M-37 with no severe rust is a hard thing to do without spending alot of money. I was very pleased to find hardly any through rust on this truck.
The owner before me was kind enough to do a video walk around of the truck. He video taped it while it was running, and when he was driving it. I would highly reccommend doing this before purchasing an old army truck to prevent any hidden surprises.
Here's the shot of my M-37 before the restoration. Three days later I started tearing the truck down.
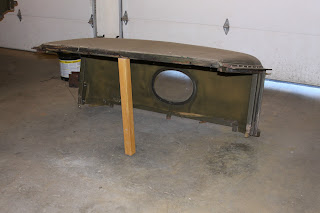
The first thing I did was to remove the hard top, and replace it later with the soft top. I sold it to a guy in New Jersey and used that money for parts
The hubs and brakes were next. Cleaning all the dried up grease that had accumulated for the past fifty years on the hubs and axles was quite a task. I repacked all front bearings with new grease and replaced with new seals and gaskets.

I drained both axle housings, and pulled axles shafts out, cleaned and reinstalled.
Front brake plates painted and reinstalled.
Here's a good side shot of the truck.
Here's a shot of the motor before the tear down. The truck was converted from 24 volt to 12volt system.
I completely dis-assembled truck box.
Man......what a mess!!! I had parts all over my garage. At times it was hard to move around. I found myself moving every thing twice or more.
I stripped the whole frame with an electric wire wheel and a paint scraper. It was much cheaper to do than sandblasting. If you can afford it, I highly recommend the sandblasting.
I would like to thank my wife Jeanne for giving up her half the garage.
I hand painted the whole frame with two coats of chassy saver. It's an epoxy paint and it's expensive!!
Oh....and don't get it on ya because it does NOT come off!!! Make sure you wear old clothes, rubber gloves and a respirator.
I made one BIG mistake in this restoration project. I should have rebuilt the engine when it was out of the truck, and I'll pay for that later on in my restoration project.
Transfer case was covered with 1/2 inch of grease and undercoating. It took a hammer and an old "1" wide wood chisel to remove old hard grease. I replaced all the yokes, two bearings, all new seals and gaskets, and rebuilt the E-brake.
I had a new gas tank fabricated by a local welder.The dimensions of the new tank are bigger than the old tank. While the new tank was being built, I fabricated new gas tank brackets to fit the extsiting holes of the frame.
Parts and pieces are slowly getting added and things are coming together.
I rebuilt the winch, painted it, and re-installed it to the frame along with the bumper brackets.
I gunked the drive shafts, and universal joints. Repainted the shafts, greased, and installed them.
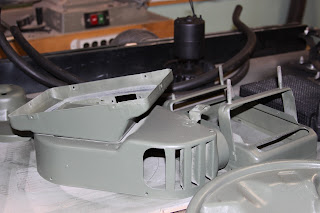
Rebuilt heater.
I cleaned all parts up with a wire wheel. Painted them. and hung them to dry.
I wired wheeled and sandblasted the cab. Then I painted the bottom and inside the cab chassy black. This cab had no through rust in it at all!!!
I painted the cab the same color it was in 1953 to military spec.
WOW!!!.... I like what I see. I had the some guys from the neighborhood over to help lift the cab onto the frame. Then we all had beers... on-Mikey of course.
M-37's are known for rusting under the headlight area. This truck had a rust hole about the size of a dime. It's amazing how that hole grows when you start to cut out the bad steel. The other fender had no rust at all.
I matched up the steel gauge with the fender, cut and bent the steel to form with the fender. I have a friend who tig welded the pieces to the fender. He did an awsome job. I must say my friend (Dale) who did all the welding on my truck was a big help to me. We traded work for work. He welded on my truck and I built him a set of steps for his deck.
After the body work was completed, painting and priming the fenders were next. I wire wheeled both fenders down to the steel. Painted the bottom of the fenders Chassy Saver, and the top with some epoxy primer.
The fenders came out great!! Oh....I should tell you guys a little secret. I sponge rolled everthing on this truck. The primer coats, and the finish coats. I was looking for a flat matted look, and I got it. Plus, when I take the truck off road and if I happen to get a scratch on the fender I can just sand the scratch with some 220 grit, and roll the fender out.
Same restoration I did with the fenders I did with the hood. Not a bad finish for a sponge roller.
First, I found a little through rust on the driver side bottom corner. Again, I cut out all the bad medal, fabricated a corner piece that fit prefect. Now, it was time to go see my friend Dale to weld it up. I also took the truck doors with me to have some unwanted holes filled.
I'm back from Dale's and the windshield is ready for primer.
I ordered two new interframes that hold the glass in place. They get mounted to the windshield frame on a long hinge. The new interframes also come with the glass installed.
Repairing a steering wheel is much cheaper than buying one. Buying a brand new steering wheel can cost anywhere between $150 to $200 dollars. I fixed mind for fifteen bucks!! All you need to buy is some JB weld (epoxy puddy), black paint, and some 220 sand paper. The only tools needed are a V file and a portable drill with a 1/8 inch drill bit. My steering wheel had cracked badly with 1/8 inch to 3/16 cracks in it. My steering wheel had a total of sixteen in all. The first thing I did was to take my V file And file all the cracks out.
After you V file the cracks out it should look something like the photo above. After all cracks are filed out, take your portable drill and drill 1/8" holes on both sides of the V shaped crack. Then take the epoxy puddy and work it into the cracks. Make sure you push hard to work the puddy into the holes you just drilled. Make sure you leave the puddy high enough so you can sand it smooth to the wheel.
Here's another shot of my steering wheel. I still had more filing to do. Next step is to sand your wheel down with some 220 sand paper. Clean the steering wheel with minerial spirts, and paint. Mine came out awsome. I have a picture of my steering wheel finished later on in my Blog.
Next, I bought 7/16 inch winch cable 150 feet long. When I ordered the cable I had the ends of the cable made up professionally, so I don't have to use cable clamps. It looks much better.
I sanded the headlight buckets down to the steel inside and out. I primed and painted them black.
Well.... after painting all parts and pieces its time to put it all together. Its starting to look like a truck again.
Next up is the wiring harness.
Sandblasted light cans.
M-37 truck dash.
Prepping rear fenders for paint.
Tires are next.....What a pain in the a##!!!
Fenders and tailgate are painted and installed.
I refinished pioneer tool kit and installed it.
My Dodge M-37 was completed in the secound week of August 2012.
Two weeks later my truck won first place in our home town parade. I won 75.00 Bucks!!! That was cool. Heres two more pictures of my truck right after the parade.
Pictures in the state land.
Here are some up dated pictures. I installed fording pipe, canvas top, and new wooden rack.
Installation of troop seats.
Installed D-rings to the floor.
New antenna installed.


Nice post Mike! LOVED all the pictures! Well done! :)
ReplyDeleteMike,
ReplyDeleteYou sure do nice work! I am on my 3rd M37 and it has waited far too long to get it started, but it is about time for my turn to give it a try. On the plus side I live in the desert so no rust problems, and there is a nearby bombing range with 25 or 30 M37s if I need parts. If mine turns out half as well as yours I will be pretty happy. Best regards, SSGT / SSG Frank Novak
Wow!!! That's a lot of 37's for parts....your a lucky man. Do they still use the bombing range? You should take a picture and send it to me....I have never seen that many 37's together at one time. Frank... sent me some pictures of your truck ok...I would love to see it. GmG3 petrella
Delete